Wednesday, April 30, 2014

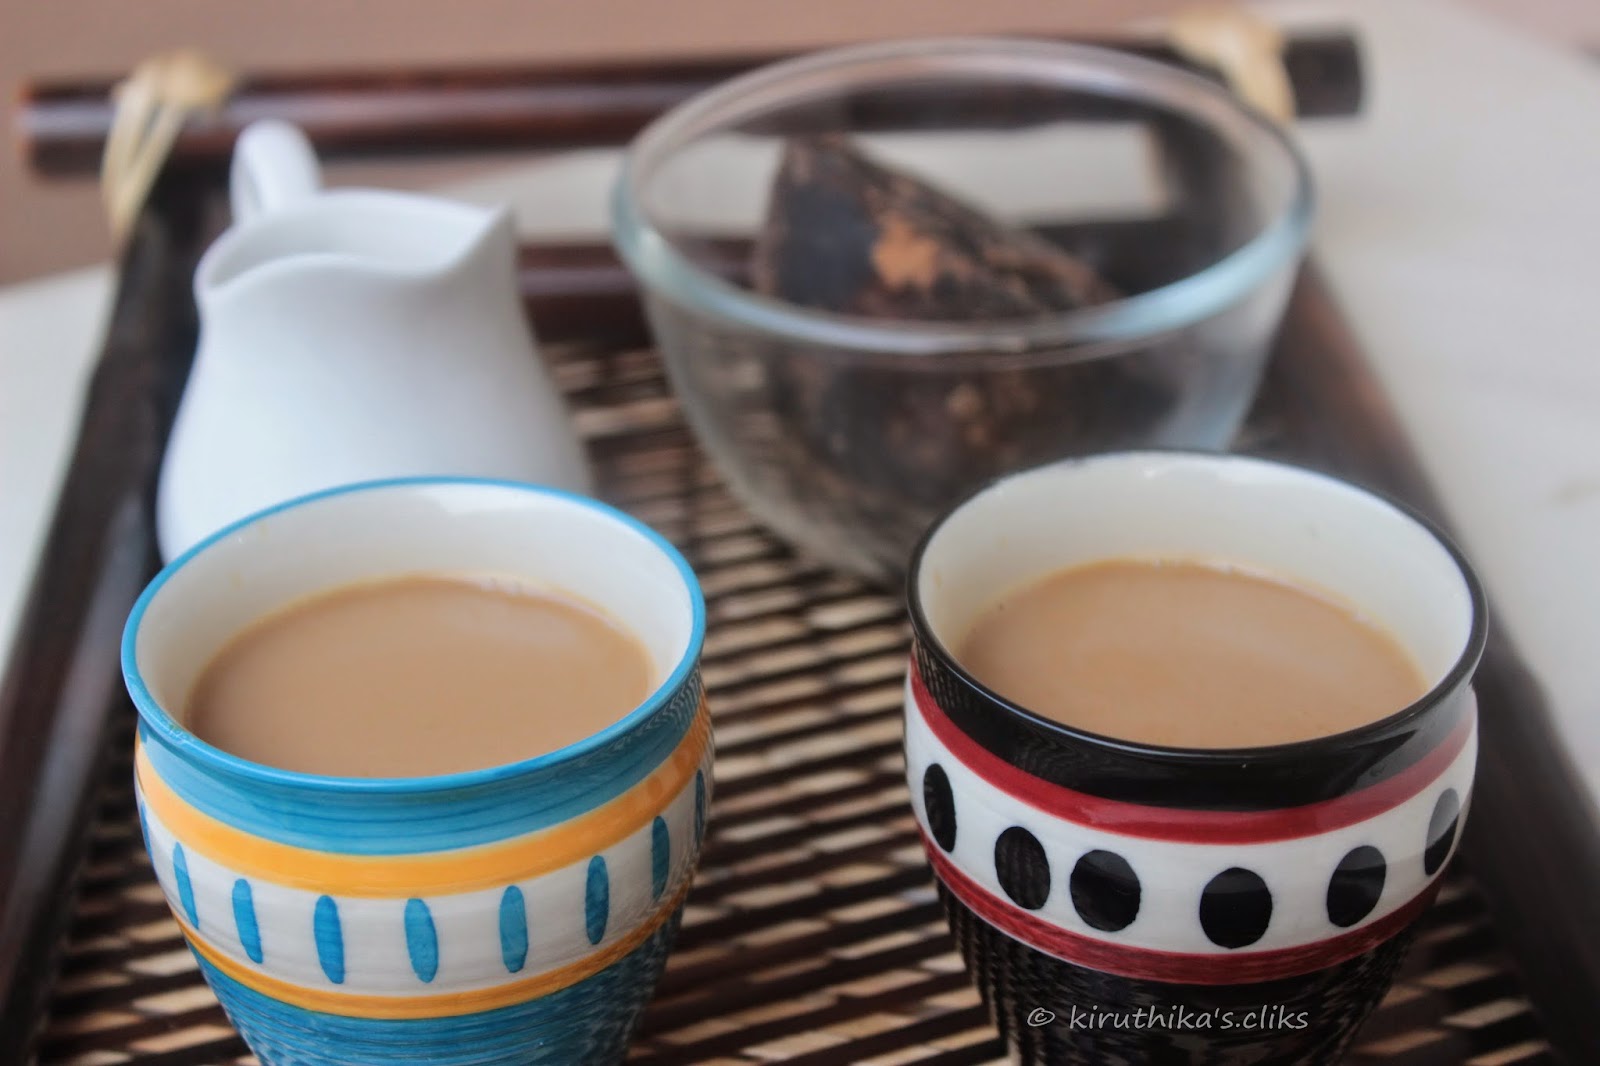
Karupatti Kappi (Coffee) / Coffee flavored with Palm Jaggery


                     My most of the childhood summer days, I will be in my grandmas house. In that village, there will be many Palm farms, Paddy fields and so on. Everyday morning I will go along with my mama (mother's brother) to have the Pathaneer (sugary sap extract from palm) and Nungu (Palm fruit). The tasty will be so yummy that none of the milk shakes and fruit juices can give . We used to have lots of palm jaggery stored in our houses. Hence very often my mother makes this Karupatti coffee(Coffee flavoured with Palm Jaggery) and used for making kanjis(porridge) also. As it is nature's gift, it is absolutely good for our health.       


                     First let me explain about Palm Jaggery and making. Palm Trees are found in Southern Part of India. The first extract of the palm juice is boiled at high temperatures, along with a little salt. The added salt then acts as a preservative and also prevents the jaggery from becoming too sweet. When cooled, it is poured into a long cone made of palm leaves.The preservation of the final product is done by wrapping the cone with rice straws. Then the jaggery is cut into disc shapes. After it dries, the jaggery is being stored in an air-tight container which preserves it for nearly one year.


                       This has lots of medicinal values that it can be used by all age groups. It is rich in calcium, iron and diabetic friendly too.  And finally into the recipe. Having a cup coffee in a wet and cool morning is always gratifying and that too a healthier one. 


Prep time 5 mins
Cooking time 10 mins

Ingredients

2 tbsp Palm Jaggery (Crushed) 
2-3 tsp Ground Coffee Powder 
1 cup Milk (warm)
2 cups Water

Procedure

1) In a sauce pan pour water and add the palm jaggery along with it. In medium flame allow the palm jaggery to melt in water completely. Once melted add the coffee powder and again allow it to boil for 2-3 minutes. Once done remove from the flame.


2) Then strain the impurities from the above coffee and palm jaggery decotion.

Add warm milk and ready to be served.


                            Note:
  • Adding of hot milk will curdle the milk and the whole coffee will get spoilt.
  • Adding Instant coffee powder will not work.


Tuesday, April 29, 2014

Mango and Dates Milkshake(Smoothie)


                        Yes, the mango season is ON. It is really hard to find a person who hates mangoes. My amma(mother) the biggest fan of mangoes. So, whoever comes to our house during summers will be with a basket of mangoes. We all will relish our summer with these mangoes.

                       I went to my native few days back, and was very happy to see that the mango tree in my house was full of mangoes (unriped). My house is very near to river Tamirabharani, and so monkeys will be our daily visitors. Every morning we can see some monkeys sitting on the mango tree and having their breakfast. Missing my home.

                     The specialty of mango is that even kids will love it. So I thought I could make a milkshake with mango and dates as it a healthy combo. And the simple recipe for you.


Prep time 15 mins
Cooking time Nil

Ingredients

2 cups Mango (Chopped and Deseeded) 
4-5 nos Dates (tender ones preferred)
2 cups Milk (cold preferred)
1 tbsp Sugar (optional)


Procedure

1. Remove the seed and and chop the mango.

2. Then in a blender put the 2 cups chopped mango and dates and blend it, until smooth. 

3. Transfer it to a container and then serve it.

                  Note:

  • Refrigerate if needed.


Monday, April 28, 2014

Pinepple Payasam / Pineapple Kheer


                    There was excess amount of milk in my house. So, I thought I could give an attempt for trying a new recipe. I had pineapple in my fruit basket also. So started searching for pineapple recipes, found more of pineapple kesaris and pudding. For making the pudding I was in short of gelatin. So I thought I could try sometime like payasam / kheer. So finally ended with this pineapple payasam.


Prep time 10 mins
Cooking time 15-20 mins

Ingredients

3 cups Pineapple (for grinding)
1 cup Pineapple (Chopped) for topping
1/4 to 1/2 cup Jaggery
1/4 cup Raw Rice ( or Payasam Rice)
2 cups Milk
2-3 nos Cardamom
1/2 cup Water


Procedure:

1)First remove the skin of the pineapple and chop into pieces for blending. Chop the pineapple into small pieces for the topping. 
In a blender, blend the pineapple and keep it aside. You can also see the jaggery for making the payasam.


2) In a heavy bottomed vessel put the extracted pineapple along with jaggery. Allow it to cook in medium flame.
Once cooked you can see the change in colour of the juice extracted. The mixture will also start spluttering out (bubbling out). 
Keep the cooked pineapple juice aside and let it to cool down.


3) We have to cook the rice along with milk. Usually I cook the rice with little amount of water initially and then add the milk,and allowing it to cook in medium flame.


4) Once the water is completely absorbed, add milk and allow it to cook. When almost done,add cardamom. Allow it to cool down after fully cooked.


5) When both the mixture have cooled down completely, mix them together. Stir continuously such that both are mixed well. Refrigerate and serve the payasam/kheer with the chopped pineapple topping.


Monday, April 14, 2014

Watermelon, Ginger and pepper Juice Recipe


                      I love drinking watermelon juices, but sometimes will feel that they are so sweet and will have some salted biscuits or something mirchi at the end. So thought of trying this Watermelon, ginger and pepper juice. It is continuation of my experiment with watermelon ginger juice.

                    When bored of sweet fruit juices I think everyone can give a try.


Prep time 15 mins
Cooking time Nil

Ingredients

2 cups Watermelon (Chopped and Deseeded) 
1 inch sized Ginger
4-5 nos Pepper Crushed or 1 tsp pepper powder
1/2 Lemon (Juice extracted)
1 tbsp Sugar (optional)

Procedure

1. Remove the seeds and and chop the water melon. Leave off skin( green color)

2. Then in a blender put the 2 cups chopped melon and ginger and blend it, until smooth.

3.  Now strain the extracted juice and transfer it to a container and pour the extracted lime juice and crushed pepper (or pepper powder). Mix well such all are mixed uniformly. Topping with ice cubes is as per your wish.


              Note:
  • As we are straining off the juice, it is not necessary to remove the seeds.


Thursday, April 10, 2014

Preparation of Butter / Home Made Butter


                       When I went through an article about butter, I came to know about the benefits of butter and that's why Lord Krishna was back of it. It is heart healthy and has lots of anti ageing properties in it. And home made butter is always 200% pure.

                      In my childhood days, I remember my Aachi ( grandmother) and Amma, churning the buttermilk/curd to separate the butter which in turn is transformed into ghee. When my mother was in short of time, she tried the same process with mixer grinder. That was more easy (difficulty only in washing the mixer jar). So the process is well defined for me.


Prep time  8- 10 days ( For collection and fermentation of the milk cream)
Cooking time 20 - 30 mins

Ingredients

Collected Milk Cream 
2 tsp Curd (For fermentation of collected Milk Cream)
2 tsp Curry Leaves
1 bottle Cold water


Procedure ( Explained Step by step)

Step 1:
First we have to boil the milk and keep it aside to cool down. Now you can see a layer of milk cream formed above the milk (the bubbled one).


Step 2:
Refrigerate the milk so that the collection of the milk cream will become easier.

Step 3:
Collect the milk cream alone in a container and store it in refrigerator. Repeat the same process and collect the milk cream for nearly one week.


Step 4:
After that no need to refrigerate the collected cream, instead you will have to ferment using the curd.
Add 2 tsp of curd to the collected milk cream and mix well. 


Step 5:
Now we have to allow it to ferment. 

  •  For hot regions only one day is enough for fermenting.
  •  For cold climate it takes two days to ferment. 
  •  No need to allow it to ferment for more than that because the collected cream should not get spoil't.

Step 6:
The next step is to churn the collected milk cream to obtain the butter out of it. I used the mixer grinder along with some chilled water.


Step 7:
Put the fermented milk cream till half of the mixer jar. Then switch on the mixer for nearly two minutes (in position 1). Then add some chilled water and again switch on the mixer for one minute (in position 1). Now you could see the butter getting separated. 


Step 8:
Transfer the contents into a wide opened vessel so separating the butter will be easy. Using your hand move butter aside, such that all is collected in one side. The picture shows the buttermilk and the butter.Separate the butter and buttermilk


  Hence the butter obtained. The butter milk obtained is fat free and can be consumed. This butter milk is Diabetic Friendly.

                         
                           Note: 
  • The buttermilk can be used for moor kuzhambhu also.


Click for the Preparation of Ghee from Butter.


Preparation of Ghee or Clarified Butter / Home Made Ghee


Ghee...
               The sound of it, brings glee (great delight), turning on my taste buds. Adding ghee to any recipe, brings forth an exotic taste and smell. When I was a beginner in cooking, I covered up my blunders in the recipes, by using ghee to make up the taste.

                Ghee is believed to have some medicinal values and it is used in preparing legiyam (a medicinal product). It is claimed to increase its shelf life too. This post will not be enough for discussing the benefits of ghee.
                
               The base of ghee is milk cream (which transformed into butter). The yellow colour of the ghee is always magical.


Prep time 5 mins
Cooking time 20-30 mins

Ingredients

1 cup Butter (unsalted)
1 spring Curry Leaves/ Drumstick Leaves


Procedure ( Explained Step by step)

Step 1:
Put the extracted butter/ unsalted butter (ready made) in a kadai, in medium flame.
You can see the butter start melting.


Step 2:
The butter will start bubbling within few minutes. Bubbles will be unclear by this time.
Then the scum like getting separated, from the liquid (i.e., ghee).


Step 3:
Once you see the clear bubbles coming, put the curry leaves or drumstick leaves. After putting the leaves just move back, because the leaves will start sputtering.
In next two minutes you can see the ghee getting completely separated.


Step 4:

Strain your extracted ghee and store in a container.


Click for the Preparation of Butter from Milk Cream.


Carrot Juice with Milk Recipe


                 When working in Chennai, whatever may be the climate, but whenever I go to Pazhamudir Cholai I will always have carrot juice only. I usually avoid sugar and ice cubes in juice, but still the taste will be great as because they will add milk. I am an all time fan of this carrot juice served there.


                            I will think of having this carrot juice at-least twice in a week, because it is very good for skin. Being a person with very bad memory will forget to have this juice and will have it once in a while only. 


Prep time 15 mins
Cooking time Nil

Ingredients

2 nos Carrot (Chopped) 
1 glass Milk
1/2 glass Water(optional)
1 tbsp Sugar (optional)

Procedure

1. Wash the carrot thoroughly and chop it.

2. Then in a blender put the chopped carrot & sugar and blend it, then add milk and blend until smooth.

3.  Now strain the extracted juice and transfer it to a container.You can top with ice cubes if needed.

              Note:
  • Adding of water is optional.
  • Usually I will use lukewarm milk for this juice preparation.


                        My cup of skin nourishing carrot juice is ready to be enjoyed.


Wednesday, April 9, 2014

Watermelon Ginger Juice Recipe


                       Last weekend we went out for lunch (buffet), it was nearly four (started by three) for us to finish the lunch . Then I felt like taking a walk as I had very heavy food. We went into a shopping mall for a small walk. Now it was almost five, so I thought I could have a tea/ coffee. But when I saw a cane juice shop, my idea of having a tea got evaporated and desired to have a cane juice to quench my thirst. And I ordered for a lemon ginger cane juice, had it and enjoyed it.

                       Yes, my idea of making Watermelon Ginger juice was only because of the cane juice I had on that weekend.


                   For clicking the juice, I used the glass bottle and my daughter (who hates watermelon) got impressed with the glass bottle and tasted the juice. She had almost a half glass of juice, I suppose after liking the taste only. It was a great pleasure for me, as the juice was a blend of ginger and lemon. Ginger good for digestion and lemon obviously has Vitamin C.


Prep time 15 mins
Cooking time Nil

Ingredients

2 cups Watermelon (Chopped and Deseeded) 
1 inch sized Ginger
1/2 Lemon (Juice extracted)
1 tbsp Sugar (optional)

Procedure

1. Remove the seeds and and chop the water melon. Leave off skin( green color)

2. Then in a blender put the 2 cups chopped melon and ginger and blend it, until smooth.

3.  Now strain the extracted juice and transfer it to a container and pour the extracted lime juice and mix well. You can top with ice cubes if needed.

              Note:
  • As we are straining off the juice, it is not necessary to remove the seeds.
  • Adding sugar is optional.

                 The healthy watermelon ginger juice can be gulped for quenching the summer thirst.