Friday, October 31, 2014

Sweet Corn Vada Pav

                            Even on thinking about Vada Pav, I just can stop my mind(even) drooling over it. Vada Pav is known to me only few months back, so feeling very bad that I have wasted many years without knowing the taste this iconic recipe. I had my first vada pav, only when the vada pav retailer Goli, was established in my area. I just feel in love with the recipe and was not able to stop with just one. From that day onwards, I was feasted with vada pav almost daily. Adoring taste and even much more.


                                  I was like under Vada Pav addiction. Finally one day I had to stop and tried making vada pavs at home. The taste was still pleasing, and home made is always hygienic, and changes can be made according for the diet conscious too. Tried first with mixed vegetable vada pav. When potato added to any recipe, it becomes a foolproof recipe. And one day tried with these corn vada pavs, which are more healthy. Instead of oil fried vadas, I used tawa fried corn tikkis,a healthier version. This is also a foolproof recipe.


Prep Time 20 mins
Cooking Time 20 mins


Ingredients


2 nos Sweet Corn Tikkis/Cutlet

2 nos Pav Breads
As required Butter
As required Tomato Ketchup
As required Green Chutney

Procedure

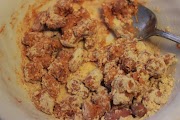
  1. Take the pav breads, slice it and apply butter on both the halves.
  2. On the top pav(inward), apply some green chutney.
  3. On the bottom pav(inward), apply some tomato sauce or ketchup.
  4. Place the tikkis in between the slices.
  5. In a tawa, put some butter and place the vada pav. Toast it till golden brown on both sides.
                        The savory vada pav in easier and healthier version is done. 

                      Note:
           It is not an authentic version of vada pav, but a healthier version.


Thursday, October 30, 2014

Red Aval (Poha) Kozhukattai /Flattened Red Rice Dumpling- A Spicy version

                               All of the sudden there was a heavy rain, last evening. The rain made the evening gracious. Decided to do something spicy and hot, which will be more soothing for the rain. And also, I was not ready to miss pleasing climate. Poha is always the optimum choice, when we want to do something fast and taste should also foolproof. Was stocked with some Red Poha (Flattened Red Rice) and yes made some spicy dumplings.

                              Poha/Flattened rice has many nutritional benefits: packed with iron, good for diabetics, good source of carbohydrate and so on. Red poha is more healthy than the white poha.

Prep time 15 mins 
Cooking time 5 mins                 
                       
Ingredients
1 cup Aval(Red)/Poha/Flattened Rice
1/2 cup Coconut Grated

As per Taste Salt

To Temper
1 tbsp Oil

1 tsp Mustard Seeds
2 tsp Bengal Gram Dal
2 tsp Urad Dal
1-2 nos Green Chilies/ Dried Red chilies
2 pinch Asafoetida
1 spring Curry Leaves (Chopped)

Procedure

1) Soak the poha for 10-15 minutes. In medium flame, add oil followed by mustard seeds, once it splutters, add bengal gram dal, urad dal, green chilies and curry leaves one by one. Once done set it aside.

2) Once the poha/aval is soaked, knead it to make a dough. Add salt and asafoetida to it.


3) Now add the tempered items along with the kneaded poha. Add the grated coconut also and knead well, so that they are spread uniformly.

4) Check for salt. Now take some dough(say lemon size) and make oval or round shaped kozhukattai/dumplings. 

Grease the idli plate/idiyappam plate and steam cook it for 5 to 7 minutes.


5) Now your simple, aval kozhukattai is ready. 

                                   Note:

  • One cup of poha when soaked will increase in amount.
  • If the poha is thin need not soak it for 10-15 minutes, five minutes would be enough. Else it would turn watery.
  • You can also use blender/mixer grinder for kneading. Kneading/Blending should be coarse and not very fine.
  • Adding of asafoetida without sauteing can also be done.
  • I added chopped cilantro/coriander leaves, as I was out of curry leaves.
                                     Healthy, simple and foolproof aval kozhukattai/flattened rice dumplings goes with kara chutney, coconut chutney. Without chutney, still it tastes yummy.


Wednesday, October 29, 2014

Sprouts Salad Recipe for Kids with Sprouted Lentil

                               Yesterday I got a chance to go to a library. My intention was to engage my kid over there, to avoid her boredom. But, I found my mind completely refreshed after I went there. Lots of books, lots of kids, lots of people and many new activities. When I was gazing through a book, I found food for kids, food for 20's, food for 30 & 40's, food for 50's and so on. Sprouts is the one item which falls almost in all categories.

                            While making this Sprouts salad recipe, I crumbled some potato chips along with the sprouted lentils, boiled peanuts and some veges. The taste turned to be better. From then I have started adding chips of some sort to the sprouts salad.


Prep time 15 mins (regardless of sprouting of beans)
Cooking time Nil


Ingredients
1 cup Sprouted Lentil / Sprouted Mung Beans.

1/2 - 3/4 cup Peanuts (Boiled)
1/2 cup Potato Chips (Crumbled)
Onion Big (Chopped)

Tomato (Chopped)
1 tsp Pepper Powder(optional)

1 tbsp Cilantro(Chopped)
As per Taste Salt


Procedure
  1. Sprouting of Moong beans is the first step.
  2. Then boil the raw peanuts for 5-6 whistles in pressure cooker.
  3. Crumble the potato chips. Chop the onion, tomato, cilantro and set aside.
  4. Now mix all the above ingredients, add salt and pepper as per taste.
  5. Sprouts salad is ready. 
                          Note:
  • You can add lemon juice if needed.
  • 1 tsp of chat masala can also be added. It gives a good flavor and taste.
  • You can add the chips you wish to add. As potato chips are tender I prefer adding them.
  • You can also add the roasted peanuts, will end in different taste.


Monday, October 27, 2014

Sweet Corn Tikki Patties Recipe /Corn Cutlet /Sweet Corn Croquette

                           My memories with sweet corn. I got to know about sweet corn only when I started my career. My native being downtown of Tamilnadu, I found it to be surprising to see the sweet corn stalls in most of the places in Chennai. I was very eager to taste it and got a cup of hot american sweet corn from a stall in Besant Nagar Beach. The taste was good, yet not to my level of expectation (being a fan of spicy food). But still I will get hot sweet corn for my small cousin brother.


                   In the recent past I went for an exhibition in my hometown. And to my surprise I found the sweet corn stalls (even in my town). Once again kids enjoying these sweet corns. Sweet corn falls under the category of kids. But still I really wanted to try something new but spicy, and ended up with these spicy sweet corn cutlet or tikkis. One more good thing about these tikkis is tawa fry is enough, no need of deep frying. So oil conscious too can have it.


Prep Time 20 mins
Cooking Time 10 mins


Ingredients


1 cup Sweet Corn Kernels

1/2 cup Dry Breadcrumbs
Onion Big (Chopped)
2 nos Green Chillies
2 tsp Ginger Garlic Paste

1 tsp Cumin Seeds
2 tbsp Coriander Leaves, finely chopped
1/2 tsp Garam Masala
As per Taste Salt
As needed Oil

Procedure


1) First divide the corn into 3/4 cup and 1/4 cup. Keep the 1/4 cup of corn aside.


2) Put the 3/4 cup of corn, ginger garlic paste, green chillies, cumin seeds in a mixer grinder/ blender and blend it. Need not add water, as corn itself will be watery.


3) Then add bread crumbs and salt along with the blended mix.


4) Meanwhile in a kadai, saute the chopped onion and add it along with the above mix. Partial sauting of onions is enough.


5) Add the remaining 1/4 cup of corn, garam masala powder and mix well.

6) Take small portions of the above mix, pat it and tawa fry them.

7) While frying you can add little oil/ butter to the sides of the patties.

                      Note:

  • Adding of onions is optional.
  • You can also add rice flour, if the corn mix is too watery.


                  Less oil, healthy, kids loving sweet corn tikkis/ cutlet is ready.


Saturday, October 25, 2014

Masala Kadalai /Kadalai Pakoda /Peanut Pakoda / Peanut Fritters

                             Looking back on to my childhood with this peanut pakoda, will just wither off the masala and have the peanuts(kadalai) only. And to my amazement my daughter also does the same. But now, I would love to have these peanut pakodas as the whole, that too with ginger tea or masala tea, it sounds to be perfect for me....


                                 I would just be gazing at these pakodas, because each and every peanut will be coated with the masala. Till I gave a try, this recipe was under difficult category. Ended up with a green signal at my first try itself. So I am recommending this simple, easy snack for my sister who is going to get married in few months...


Prep Time 10 mins
Cooking Time 10 mins


Ingredients


1 cup Peanuts 
1/2 cup Besan / Gram Flour/ Kadalai Maavu
2-3 tsp Chilly Powder
1 tbsp Rice Flour
2 pinch Asafoetida
1 spring Curry leaves
As per taste Salt
As needed Water
As needed Oil ( For Frying)


Procedure

1) In a wide bowl put all the above ingredients and mix by adding water little by little. 


2) Mix well that each and every peanut is coated with the gram flour mixture.

3) Deep fry them in oil. Care should be taken that the peanuts are separated. If they are clinging together, try separating them when in oil(using the ladle).

4)Drain the oil in paper towel. Store it in airtight container after they are cooled down.


                      Note:
  • You can add crushed garlic and fennel seeds if you wish.
  • You can also fry the curry leaves separately at the last and then add it.
  • You should be a miser in adding the water, as it should not turn too watery.
                    Easy yet impressive snack is ready for your coffee/tea.


Friday, October 24, 2014

Sprouts Salad Recipe with Sprouted Lentil(moong sprouts) and boiled peanuts

                         Whenever my amma (mother) makes sprouting of beans,etc; I will just be marvelling over the process. This wonderful world is full of wonders. 
                        I remember one of close friend sprouting this moong beans in our college hostel. She is an encyclopedia with ample information available with her and keeps on experimenting on things. Sprouting was also one of her experiments with sparse utensils available (like plates and tumblers). We friends together reap the benefits of good experiments.


                      Intake of sprouts alone, is difficult for my family as a whole. So added boiled peanuts, with some dash of pepper and salt. This combo made my day...


Prep time 15 mins (regardless of sprouting of beans)
Cooking time Nil


Ingredients
1 cup Sprouted Lentil / Sprouted Mung Beans.

1/2 - 3/4 cup Peanuts (Boiled)
Onion Big (Chopped)

Tomato (Chopped)
1 tsp Pepper Powder(optional)

1 tbsp Cilantro(Chopped)
As per Taste Salt


Procedure
  1. Sprouting of Moong beans is the first step.
  2. Then boil the raw peanuts for 5-6 whistles in pressure cooker.
  3. Chop the onion, tomato, cilantro and set aside.
  4. Now mix all the above ingredients, add salt and pepper as per taste.
  5. Sprouts salad is ready. 
                          Note:
  • You can add lemon juice if needed.
  • 1 tsp of chat masala can also be added. It gives a good flavor and taste.
  • You can also add the roasted peanuts, will end in different taste.

Thursday, October 23, 2014

Orange, Carrot and Ginger Juice Recipe - A juice for Healthy Skin....

                          Nowadays I am caught with a habit of adding ginger, with all the juices I try. If you have tasted the sugarcane juice with the dash of ginger in it, you'll accept with me. The aroma of ginger makes me feel fresh all the time....Started making Orange Carrot juice, and it ended better with a extra kick of ginger thrown in it. 


                           Moving in to the benefits of the juice. Carrot not only improves vision, but good for skin and hair also. Orange juice is full of Vitamin C (a vitamin with antioxidant property). Orange juice helps in the absorption of iron and calcium too. Ginger juice helps in killing cancer cells, reducing fatty liver and aids in digestion. I have listed only some few benefits of the above used ingredients. And now back to juicing.....


Prep time 15 mins
Cooking time Nil

Ingredients

2 nos Carrot (Chopped)
1 glass Orange Juice
1 inch sized Ginger
1/2 glass Water 
1 tbsp Honey (optional)

Procedure

1. Wash the carrot thoroughly and chop it.  Wash the ginger, deskin and chop it.

2. Then in a blender put the chopped carrots and ginger, blend it.

3. Now strain the extracted juice, add it with the orange juice and mix well. Add honey if needed.

4. You can top with ice cubes if needed.

                              Note:
  • Instead of orange juice, you can extract juice from two navel oranges and use it. The juice is more fresh than the one above.

Tuesday, October 21, 2014

Kadala Curry Recipe / Kerala Kadala curry for Puttu, Appam and Idiyappam

                                 
                             If a queue is formed for the food lovers of Kerala recipes, surely I am going to lead the queue...My native being down south of TamilNadu (and close to Trivandrum, Kerala), and so most of our recipes will be having a touch of Kerala food. And all the kerala recipes will have a bunch of nutritional values in them...


                            It was the time I was working with a software consultant at Techno Park, in Trivandrum. I was just relishing over the food (the kerala food) served in the PG (I was staying). There I got introduced to kadala curry. Usually appam will be served with kadala curry, a heavenly combination,,,,,

                           In my home, I usually make moong beans fry for puttu. Whenever I make appam, kadala curry and coconut milk will compulsorily be present on the dining table. This time the kadala curry accompanied my idiyappam. One more specialty of kadala curry is, no need to make ginger garlic paste, yet the taste will be divine...


Prep time 15 mins 
Cooking time 30 mins                 
                       
Ingredients
1 cup Black Chickpeas/Channa
Onion Big (Chopped)

2-3 nos Small Onion / Shallots / Pearl Onion
2-3 nos Green Chilies (Slit)
1 tsp Chilly Powder
1/4 tsp Turmeric Powder
As per Taste Salt


To Roast and Grind
3/4 -1 cup Coconut Grated
2-3 nos Small Onion / Shallots / Pearl Onion (Sliced)

1- 1&1/2 tbsp Coriander Seeds
1/4 tsp Fennel Seeds
2 inch sized Cinnamon
3 nos Cloves

1/2 tsp Black Pepper Corns

To Temper

1 tbsp Coconut Oil

1 tsp Mustard Seeds
1 spring Curry Leaves
1-2 nos Red Chilies


Procedure

  1. Soak the chickpeas overnight. Pressure cook the chickpeas for 5-6 whistles.
  2. Add 1 tsp of oil and roast all the items one by one starting from the species, followed by coriander seeds and shallots. Then add the grated coconut and roast until it turns brown colour. Do not over fry them. 
  3. From the above roasted items, make a fine paste by adding required water.
  4. In a Kadai, add the coconut oil , followed by the mustard seeds. Wait till it splutters. Add the curry leaves and red chilies.
  5. Now add the sliced onion big and small, green chilies and saute till the onion turns brown. Then turmeric powder and chilly powder. Saute for few minutes and add a little water.
  6. When it boils, add the ground paste and after few minutes add the cooked kadalai/chickpeas.
  7. You are done with the recipe. Wait for the consistency as per you wish...
                          Note:

  • Need not waste the water left out when cooking the chickpeas. It is full of nutrients in it. You can use this water for cooking. 
  • Instead of adding coriander seeds, you can add coriander powder also.
  • Adding coconut oil gives a very good flavor. If not available you can use cooking oil too.
  • You can garnish wish coriander leaves finally. 
The divine kadala curry will go well with puttu, appam, idiyappam, dosa , roti's and chapattis too.