Thursday, October 16, 2014

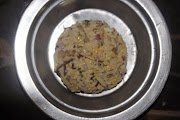
Urulaikizhangu Bajji / Aloo Bajji (Pakora) / Potato Fritters


                           In our village,  during Diwali times, we will exchange the sweets and snacks made in our houses, with our neighbourhood. In each n every plate (received from neighbour) there will be some vada's, some bajji's, some sweets and murukku. That too bajji is always banana bajji (plantain bajji).

                        And so, in my neighbourhood everybody will be waiting our plate (from my house), because my amma (mother) will feast with different recipes. Bajji's will also fall under the category. She will make these urulaikizhangu bajji, onion bajji, cauliflower bajji and so on. That too while sharing with our neighbours she will make vadas and bajjis-piping hot. Happy Memories.


                         Potatoes!!! If you find anyone saying "I don't like potatoes", then please do ping me and say I found a person. Yes, I haven't seen a single one saying no to potatoes (unless some sick reasons). The simple bajji recipe is for you.


Prep Time 10 mins
Cooking Time 10 mins


Ingredients


1 cup Besan / Gram Flour/ Kadalai Maavu

2 nos Potatoes
2-3 tsp Chilly Powder
1 tbsp Rice Flour
1 tsp Rava/ Sooji
2 pinch Asafoetida
As per taste Salt
As needed Water
As needed Oil ( For Frying)


Procedure

1) In a wide bowl put all the above ingredients and mix with water to make a batter. The batter should not be too watery, it should be in idli batter consistency.

2) On the another side, peel off the potatoes and make thin slices out of it. 


3) Now dip the sliced potatoes, in the batter and deep fry in the oil.


                                     Note:
  • Keep the flame in medium high positions, while making the bajji. Simmer position will tend to consume more oil.
  • I usually avoid adding cooking soda, as it is not good for health. But if u wish to add you can.
  • Rice flour and sooji will result in more crispy outputs.
  • While making pakora's, add some cumin seeds and coriander leaves.


Friday, October 10, 2014

Orange Beet Juice Recipe / Beetroot Orange Juice - A juice for lowering Blood Pressure....


                               Making kids eat beetroot is a challenging task. I usually make beetroot jam and stir fry. But still my kid will run away from beet. My kid loves to have tangy juices. So tried making this orange beet juice. Ya and this recipe gave me a green light.

                            Nowadays I come across many articles saying that coloured veges and fruits have lots of anti-oxidants and anti-cancerous too. In addition to this, beet is heart healthy too. Oranges as we all know is good source of Vitamin C.


Prep time 15 mins
Cooking time Nil

Ingredients

1 no Beetroot (Chopped)
2 nos Oranges (Peeled, deseeded and chopped)
1/2 glass Water (optional)
1 tbsp Honey (optional)

Procedure

1. Wash the beet thoroughly and chop it. Peel, quarter and deseed the oranges.

2. Then in a blender put the chopped beet, oranges and blend it.

3. Now strain the extracted juice and transfer it to a container. Add honey if needed.

4. You can top with ice cubes if needed.

              Note:
  • Adding of water is optional, you can increase and decrease the amount accordingly.


Thursday, October 9, 2014

Vazhaipoo Vadai recipe / Banana Blossom Vada (Fritters) recipe


                  Vazhaipoo vadai was a challenge recipe for me, as when I was newly married, I had to make some good evening snack for my in-laws. And in my husbands house they don't include the vazhaipoo(banana blossom) or vazhaithandu(banana stem) in their cooking. And so, the challenge grew up in size. But, these vadas came out very well so that I just powdered off the challenge and got appreciations from my in-laws.


                           In my childhood days, my amma(mother) will make these vadas, as we (me n my sissy) will not eat this vazhaipoo poriyal or kootu. But, inspite of her heavy work, she will patiently clean and make these vadas. I remember my grandma getting 2 banana blossoms for just three rupees. But, here in Bangalore even one blossom is more than thirty rupees. 


Prep time  2 hours ( For soaking the bengal gram)
Cooking time 15-20 mins


Ingredients


1 cup Vazhaipoo ( cleaned and chopped)
3/4 cup Bengal Gram

7-8 Small Onion chopped
3 Chilly (chopped)
1 inch sized Ginger (chopped)
2 tbsp Curry leaves (chopped)

1 tsp Fennel Seeds/ Sombu/ Saunf
2 tbsp Rice Flour
A pinch Hing
As per taste Salt


For deep frying 

As required Oil


Procedure


1. First soak the bengal gram for two hours. Then drain the water and take some bengal gram and keep aside before grinding. Grind the remaining soaked gram into a coarse paste. 

Clean and chop the banana blossom and keep it in diluted buttermilk to avoid the blossom turning black.


2. In wide basin put the chopped banana blossom, course paste of bengal gram with all the above ingredients and knead the dough for the ingredients to get distributed uniformly.
Then make round shaped vadas out of the dough.


3.In a kadai pour the oil and deep fry the vadas for golden brown colour.

 There will be no need of any chutney for side dish. Once the vada is made you cant resist yourself from eating. Be careful of the counts.

         Note:


  • Fennel Seeds is optional. Adding them gives more taste.
  • If in case you forgot to soak the dal, then no matter soak them in hot water in a closed container so that soaking time of half an hour is enough.


வெà®™்காய பஜ்ஜி


                                         à®Žà®£்ணெய்... வேண்டாà®®் என்à®±ு சொல்லுபர்கூட பஜ்ஜி என்à®±ால் சிà®±ிது யோசிக்க தான் செய்வாà®°்கள். நம் தமிà®´்நாட்டில், மக்கள் பஜ்ஜி எண்ணெயாக  à®‡à®°ுந்தால், à®’à®°ு பேப்பரை தேடுவோà®® தவிà®°, à®’à®°ு கடி பஜ்ஜியுà®®் à®’à®°ு வாய் டீயுà®®் à®®ிஸ் பண்ணமாட்டோà®®்.


                                        à®’à®°ு இனிய à®®ாலை பொà®´ுதில் பஜ்ஜி செய்யலாà®®் என்à®±ு எண்ணினேன். அன்à®±ு எங்கள் வீட்டில் வாà®´ைக்காய் இல்லை, அதனால் உருளை கிà®´à®™்கு மற்à®±ுà®®் வெà®™்காயம் வைத்து பஜ்ஜி செய்யலாà®®் என்à®±ு ஆரம்பித்தேன். என் கணவர் உருளை கிà®´à®™்கு உள்ளது என்à®±ால், à®®ிகவூà®®் பிà®°ியமாக சாப்பிடுவாà®°். ஆனால், அன்à®±ு அவர் இந்த வெà®™்காய பஜ்ஜி தான் விà®°ுà®®்பி à®šாப்பிட்டாà®°் . அதலால் உங்களிடம் சந்தோசமாக பகிà®°்கிà®±ேன்.


தேவையானவை: 

à®’à®°ு கப் à®•டலை à®®ாவு 

இரண்டு பெà®°ிய வெà®™்காயம்
2-3 டீஸ்பூன் à®®ிளகாய் வத்தல் போடி
1 டீஸ்பூன் à®…à®°ிசி à®®ாவு
1 டீஸ்பூன் à®°à®µை 
சிà®±ிது காயம்
தேவைகேà®±்ப உப்பு
தேவைகேà®±்ப à®¤à®£்ணீà®°்
தேவைகேà®±்ப à®Žà®£்ணெய் (பொà®°ிக்க)


செய்à®®ுà®±ை: 

1) à®’à®°ு அகன்à®± பத்திரத்தில் à®®ேல் உள்ள அனைத்து பொà®°ுட்களையுà®®்(எண்ணெய் தவிà®°) போட்டு, தண்ணீà®°் கொண்டு இட்லி à®®ாவு பதத்தில் விரவவுà®®்.

பின்பு வெà®™்காயத்தை à®®ெலிதாக நறுக்கி வேண்டுà®®்.


2) நறுக்கிய  à®µெà®™்காயத்தை விரவிய à®®ாவில் இட்டு, பின்பு எண்ணையில் பொà®°ிக்கவுà®®்.


                                 à®•வனிக்க:
  • எண்ணெய் சிà®±ிது சூடாகவே தான் இருக்க வேண்டுà®®், அல்லது பஜ்ஜி அதிகம்  à®Žà®£்ணெய் உட்கொள்ளுà®®் (குடிக்குà®®்). 
                                     à®‡à®¨்த சூடான வெà®™்காய பஜ்ஜியுà®®் à®’à®°ு கிளாஸ் டீயுà®®் உங்கள் à®®ாலை பொà®´ுதை இனிà®®ையாக à®®ாà®±்à®±ுà®®்.


Wednesday, October 8, 2014

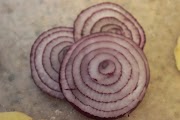
Vengaya Bajji Recipe / Onion Bajji / Onion Fritters


                             Even oil (diet) conscious people, will find it difficult to say no to bajji. Yes, bajji will be under the favorite category of many. In Tamilnadu, hot bajji's along with tea is a favorite roadside snack of many people. Even if it so oily, people will go in search of paper (for squeezing out the oil), but will not miss a bite of bajji and a sip of tea.

                           In a perfect evening, I thought of making bajji's. As i had no bananas, had to bajji with onion and potatoes only. My husband is always a big fan of any recipe made with potato, and this time to my wonder he loved the onion bajji's more than the potatoes. So with great satisfaction, happily sharing the recipe with you all.


                                      Neither prior preparations, nor soaking is needed for making these bajji's. Only with the availability of bengal gram flour and oil and veges of your kind, you can make these lovely bajjis. And onion is a universal ingredient, regardless of the different cuisines.


Prep Time 10 mins

Cooking Time 10 mins


Ingredients

1 cup Besan / Gram Flour/ Kadalai Maavu

2 nos Onion Big
2-3 tsp Chilly Powder
1 tbsp Rice Flour
1 tsp Rava/ Sooji
2 pinch Asafoetida
As per taste Salt
As needed Water
As needed Oil ( For Frying)


Procedure

1) In a wide bowl put all the above ingredients and mix with water to make a batter. The batter should not be too watery, it should be in idli batter consistency.

In another side, peel off the onion and make thin slices out of it.


2) Now dip the sliced onion, in the batter and deep fry in the oil.


                                     Note:
  • Keep the flame in medium high positions, while making the bajji. Simmer position will tend to consume more oil.
  • I usually avoid adding cooking soda, as it is not good for health. But if u wish to add you can.
  • Rice flour and sooji will result in more crispy outputs.
Hence, hot onion bajji with tea will make your evening a pleasant one.


Friday, October 3, 2014

Milagu Poondu Kuzhambu / Garlic Pepper Kuzhambu


                             It was the day, that my sister has to treat her friends with self cooked food. That too it should be a puli kuzhambu type ( made with tamarind syrup). So she was asking for some good recipe and got the recipe from my grandma. Each and every dish made by my grandma is 200% healthy. And so this milagu poondu kuzhambu. Poondu (Garlic) and milagu (Pepper) is full of anti-oxidants and much more benefits...


                           With my lil little guidance, she did it, and the taste was really good. And so the weekend lunch was prepared by my sister. Felt highly relaxed...

                          On the next day, my sister packed the milagu poondu kuzhambu accompanied by some dal and poriyal (for her friends). And they too relished the lunch platter.


Prep time 15 mins
Cooking time 30 mins


Ingredients


25-30 nos Garlic Peeled 
Small lemon sized Tamarind

To dry roast and grind
2 tbsp Urad Dal 
2 tbsp Channa Dal
2 tbsp Coriander Seeds
1 tbsp Pepper
1/2 tbsp Cumin Seeds
8-10 nos Dried Chilies 
5 springs Curry Leaves

To Temper

1 tbsp Sesame Oil
1 tsp Mustard Seeds
1 spring Curry Leaves


Procedure:


1) Soak the tamarind, for atleast half an hour. Peel the garlic and keep aside. 
Dry roast all ingredients and grind it a fine powder.


2) Extract the juice of the tamarind. Put the ground powder along with the juice.

  • In a thick bottomed vessel, put the sesame oil, followed by mustard and allow it to splutter. Then put the curry leaves and peeled garlic. 
  • Saute till the garlic is half cooked. 
  • Now pour the above tamarind syrup with ground powder.


3) Keep on stirring in intermediates till a rolling consistency is obtained, and so you are done.


                                         Note:

  • Instead of garlic, you can also add malai poondu (bigger one, than the country type).
  • You can also add few chopped small onions while tempering. But without onions also the taste was good.
  • You can also increase and decrease the pepper and the dried chillies count accordingly.


Wednesday, October 1, 2014

Thalicha Mor /Neer Mor /Spiced Buttermilk Recipe


                          I remember learning that, there are 3 seasons in India; Summer, Winter and Monsoon. But it is only the climate Summmer that always persist here in Chennai, its too hot always. Inspite of the hot climate, the metro work, so riding in Chennai is becoming more than meditating (as it is stealing our patience).

                         And coming back to Spiced Buttermilk or thalicha mor; In my village, the farmers back from the fields will be welcomed by this thalicha mor only. The relishing taste; will be a treat for the taste buds, as well a coolant for our body. You too can feel it up.

                        Using the butter milk left out while churning the milk (for butter) can also be used. This churned buttermilk is very good for health as it is fat free, especially for diabetics. But instead, the thick curd or yogurt can be diluted.


Prep time 5 mins
Cooking time 5 mins

Ingredients

1 cup Thick Curd/ Indian Yogurt (Plain and unsalted)
3 cups of Water
1/2 tbsp Curry Leaves Chopped
1 tbsp Coriander Leaves (Cilantro) Chopped
1 pinch Asafoetida
As per Taste Salt


To Temper

1 tsp Oil
1 tsp Mustard

3 nos Dried Chilly / Green Chilly
1 inch sized Ginger Chopped
1/2 tbsp Curry Leaves Chopped

Procedure

1) Beat the curd with 3 cups of water.
2) Chop the chilies, ginger,curry leaves and cilantro.
3) Add the salt, chopped cilantro and a pinch of Asafoetida and mix well.
4) In a frying pan heat oil, add mustard, after it splutters add the chopped dried chilies, ginger, curry leaves and Asafoetida.
5) Add the above to the buttermilk, mix well.

Ready to be served.


                     Note:
  • Instead of dried chilly, green chilly can also be added. But reduce the count for green chilly.
  • The left out buttermilk while churning for butter can also be used.